It has oftentimes been said that a picture is worth a thousand words. Especially when you’re approaching a much more visual subject on your blog, having several pictures can be worth even more. This is true when you’re covering an event, reviewing a product, or otherwise illustrating any number of possible blog topics. You want to share original pictures with your readers and these pictures can add tremendous value to your post.
You could insert each individual picture into the blog post itself and, depending on the context, that could be entirely appropriate. However, there may be circumstances where you might want to avoid putting every picture in the post itself.
You might not want to upload all that content to your own web hosting service, because you might run out of storage space or you might use up too much bandwidth. You might not want to negatively impact the page load times on your blog, as having too much multimedia content can really drag a site down. Whatever the reasoning may be, a great workaround is to use a slideshow. This feature is built into WordPress, but what if you’re not uploading the pictures to your own server?
One of the more popular image sharing and image hosting services on the Internet is Flickr, particularly because you can get unlimited free storage through the site. There are also a number of WordPress plugins that further automate the process. One problem is that Flickr is generally designed to only let you embed individual images and not slideshow albums containing multiple pictures.
A free online tool that addresses this specific issue is Flickr Slideshow. While you can’t create a custom slideshow cherry-picking individual images from your Flickr photostream, you can create a slideshow with the images in any of your sets or albums.
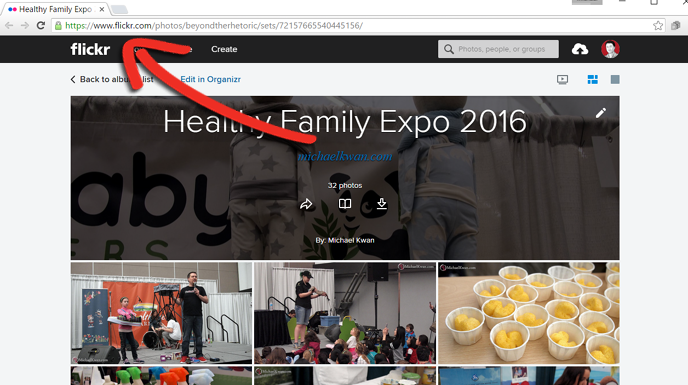
The first thing you’ll need to do is grab the URL of the Flickr album you want to embed as a slideshow. It doesn’t even need to be from your own account, though presumably that’s how this will be used most of the time.

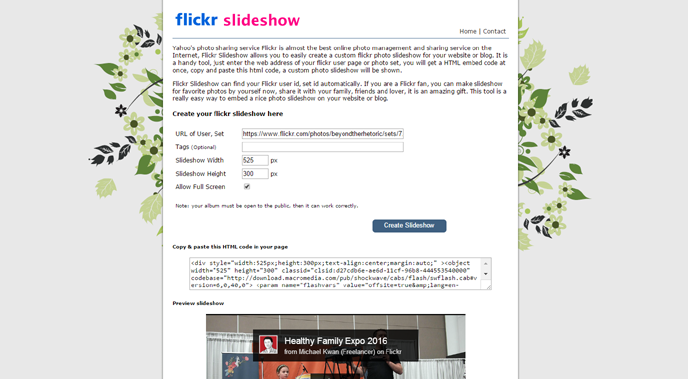
Next, go to the Flickr Slideshow website and fill out the corresponding fields. The URL of the Flickr album goes into the first text field. You can skip the Tags section and move on to defining the slideshow width and height.
Generally, you’ll want the width to be the same as if you were embedding a single image in your blog, which would depend on your blog’s theme. The height should then be calculated to be in line with the aspect ratio of your images. You could add a little buffer space if you’d like and this will result in black bars at the top and bottom. Below the width and height is a tickbox if you want the slideshow to allow full screen mode.

Click on the blue “Create Slideshow” button and the HTML code will get generated with a live preview of the slideshow beneath that. If everything looks the way you want it to look, copy the HTML code and paste it into the blog post where you want to embed your Flickr slideshow.

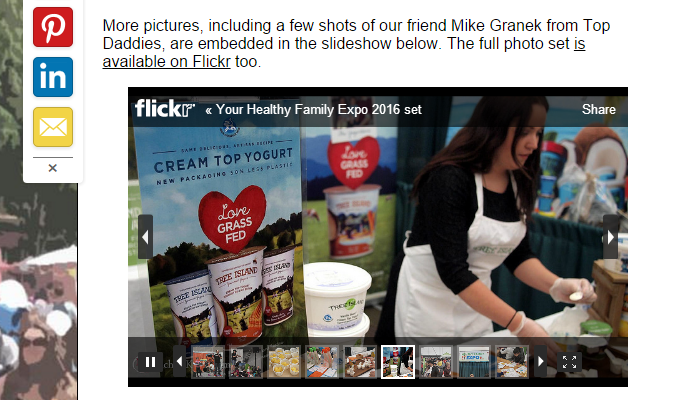
Here’s an example of the slideshow in action with my post from the Healthy Family Expo. Readers can click on the arrows to browse through the images or they can allow it to autoplay through. The text with the name of the Flickr album is clickable and the full screen button is visible toward the bottom right of the slideshow too.
One downside to using Flickr Slideshow for this purpose is the resulting slideshow is Flash-based, so it won’t work for users who don’t have Flash-enabled browsers. As such, it’s a good idea to link directly to your Flickr album somewhere in the blog post text too.
An alternative, which would require a little more work on your part, is to create a video slideshow using the software of your choice (Windows Live Movie Maker and iMovie are free options), upload it to a service like YouTube, and embed that video instead. Again, there are pros and cons to this approach too, so it’s really up to you what solution you prefer.
But remember to use those pictures! The Internet is increasingly multimedia-focused and your giant block of text can be very suitably bolstered with some choice images.
