The following is a step by step guide, complete with tons of screenshots, that will show you how to install WordPress onto a web host like HostGator. Basically, what you’re going to see is the process I go through when someone orders a free WordPress installation. It is my hope that once you see how easy it is, you will order a HostGator plan using my link and install WordPress yourself, thereby saving me some work. 🙂
Step 1 – Order Web Hosting
HostGator is my official web host and hosts all my blogs. They offer excellent service and I highly recommend them. HostGator hosting plans start at only $4.95 per month and they’re running a 20% off special so now would be a good time to order a plan if you haven’t done it yet. Use coupon code JohnChowRocks to get yours the first month of hosting for only 1 cent.
Step 2 – Wait for the HostGator Email
Once you order your plan, HostGator will send you an email with your new account information. The email looks something like this.

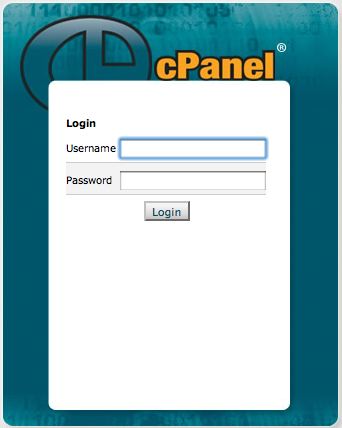
What you need to do is click on the link to your control panel. This will bring up the cPanel login screen. Enter the username and password HostGator gave you and it will log you into your control panel.
Step 3 – The Control Panel
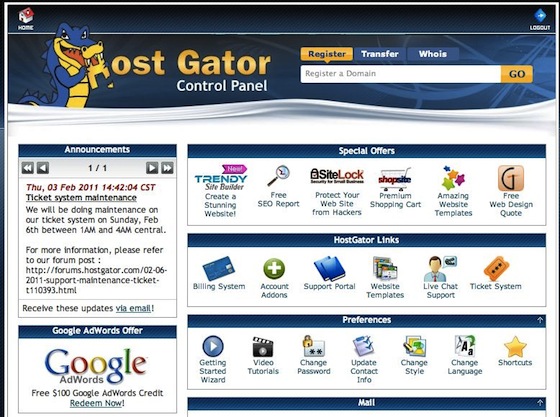
The HostGator control panel is where you redeem your $100 Google AdWord credit. The page has a lot of icons but don’t let that intimidate you. There’s only one icon we’re interested in. Scroll down towards the bottom until you get to the software/Services panel.
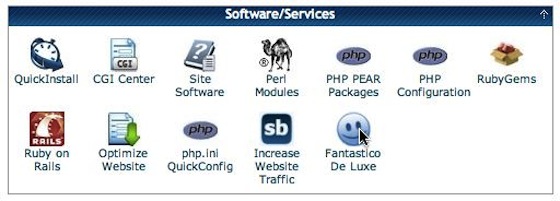
From the software/Services panel, click the “Fantastico De Luxe” icon.
Step 4 – Using Fantastico De Luxe
You will see a long list of software that Fantastico can automatically install. Looks under the Blogs category and click the link for WordPress.
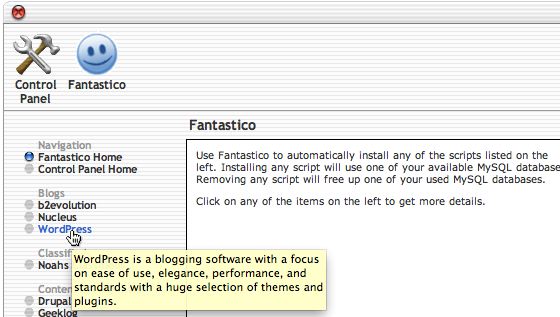
Now click the “New Installation” link.

If you want to install your blog in the root directory (yourname.com) leave the “Install on directory” blank. If you want to install your blog on a subfolder (yourname.com/subfolder), then enter a name for the “Install on directory” field. Most bloggers install their blogs on the root directory.
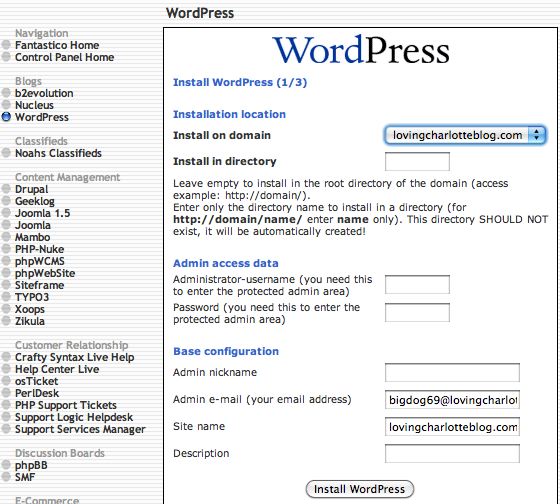
Choose an admin username and password for your new blog and enter them into the corresponding fields. You should write the username and password down so you won’t forget it. This information is what you’ll use to log into your new blog. Fill in the remaining information and then click “Install WordPress.” The next screen will appear after a few seconds.
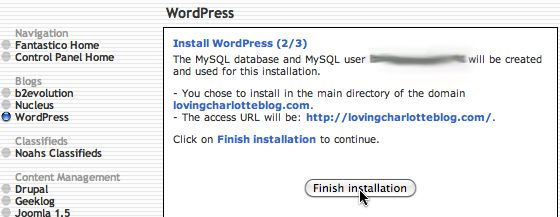
Click the “Finish installation” button. Now, enter your blog’s URL and have a look at your new WordPress blog!

Step 5 – Updating WordPress
Because WordPress is constantly improving, the version that Fantastico installs may not be the latest. Fantastico is usually a few weeks behind on getting the latest version. Fortunately, updating WordPress is very easy. Log into your WordPress control panel by entering http://YourBlogURL.com/wp-admin/.

You will see a yellow bar running across the top telling you that a new WordPress version is available. Click the “Please update now” link. This will take you to the update page. Click the “Update Automatically” button.
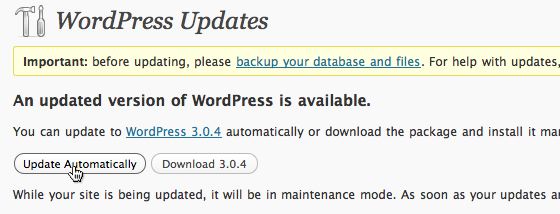
When you click the auto update button, WordPress will download the latest version of the software from WordPress.org and automatically update your blog. This only works on web hosts that support the auto update feature. If your host doesn’t support auto update, then you’ll have to open up the FTP program and update WordPress manually. But that’s a whole other blog post! My advice: stick with HostGator.
Step 6 – Set The Permalink
On the right side menu, go to “Settings” and choose “Permalinks.” From here you’ll be able to control how WordPress displays its URL. The default setting is not very search engine friendly so you’ll want to change it.
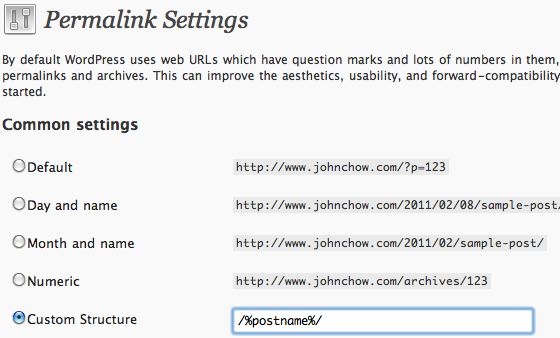
For the free WordPress installation service, I use a custom /%postname%/ structure that shows the blog URL plus title of the blog post. Instead of yourblog.com/?p=123, the URL will be yourblog.com/your-post-title. This is much more search engine friendly.
Step 7 – Allow Search Engines to See You
Again on the right side menu, go to “Settings” and choose “Privacy.”

By default, WordPress blocks off your blog from the search engines. Obviously, this is not ideal since we want Google to be able to find us. Change the value to make your blog visible to everyone including the search engines then click the save button.
Step 8 – Upgrade The Plugins
Click the Plugins link on the left side of the menu.
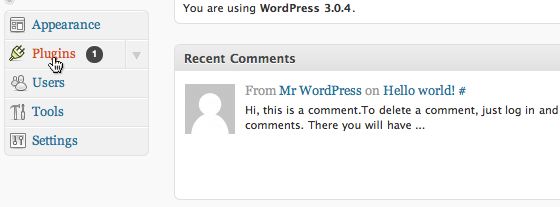
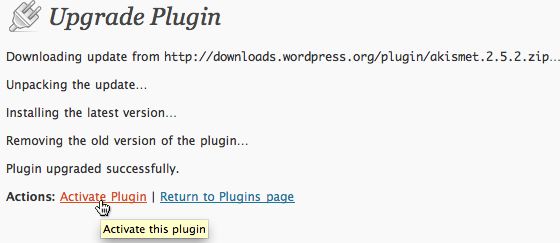
WordPress will let you know if there are any updates available for the installed plugins. You can update to the latest version by clicking the “upgrade automatically” link. Again, this only works with web host that support this feature.

Step 9 – Adding New Plugins
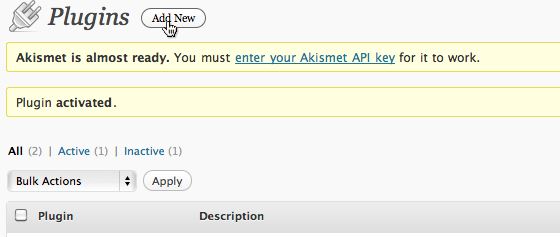
You can add pretty much any WordPress plugins directly from your WP control panel. Under the Plugins screen, click the “Add New” button.
Search for the Plugin you wish to install. In this case, we’re looking for the All In One SEO Pack.
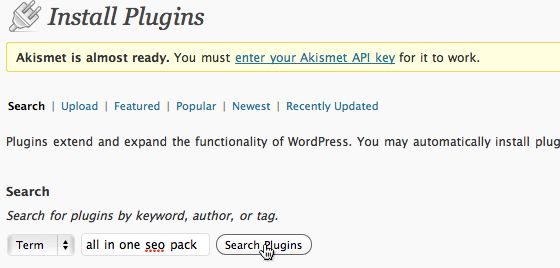
WordPress will display a list of Plugins matching the search term. Find the Plugin you’re looking for and click the “Install Now” link. The plugin will automatically install. Click “Activate Plugin” to turn it on.
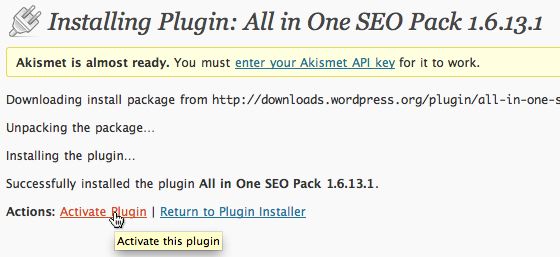
Repeat the above steps for any other plugins you want to install. I guess I shouldn’t have to tell that this only works with web hosts that support the auto install feature. 😛
Step 10 – Write Your First Blog Post
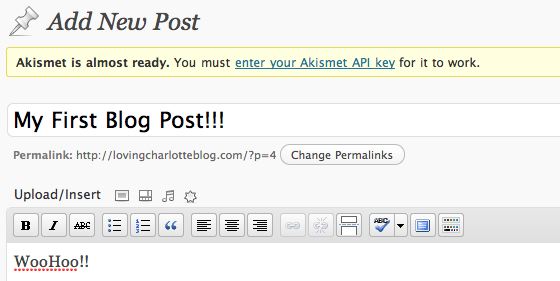
Congrats! You have successfully installed and set up your own WordPress blog. Now go write your first blog post!
If you’re still unsure about installing WordPress by yourself after reading this, then go ahead and order the free WordPress installation service. However, I do encourage you to try installing WordPress by yourself. Don’t worry about screwing up. You can always order the free WordPress installation service and have me fix it. 🙂

